Tutorial: How to Mount a Quilt on Canvas
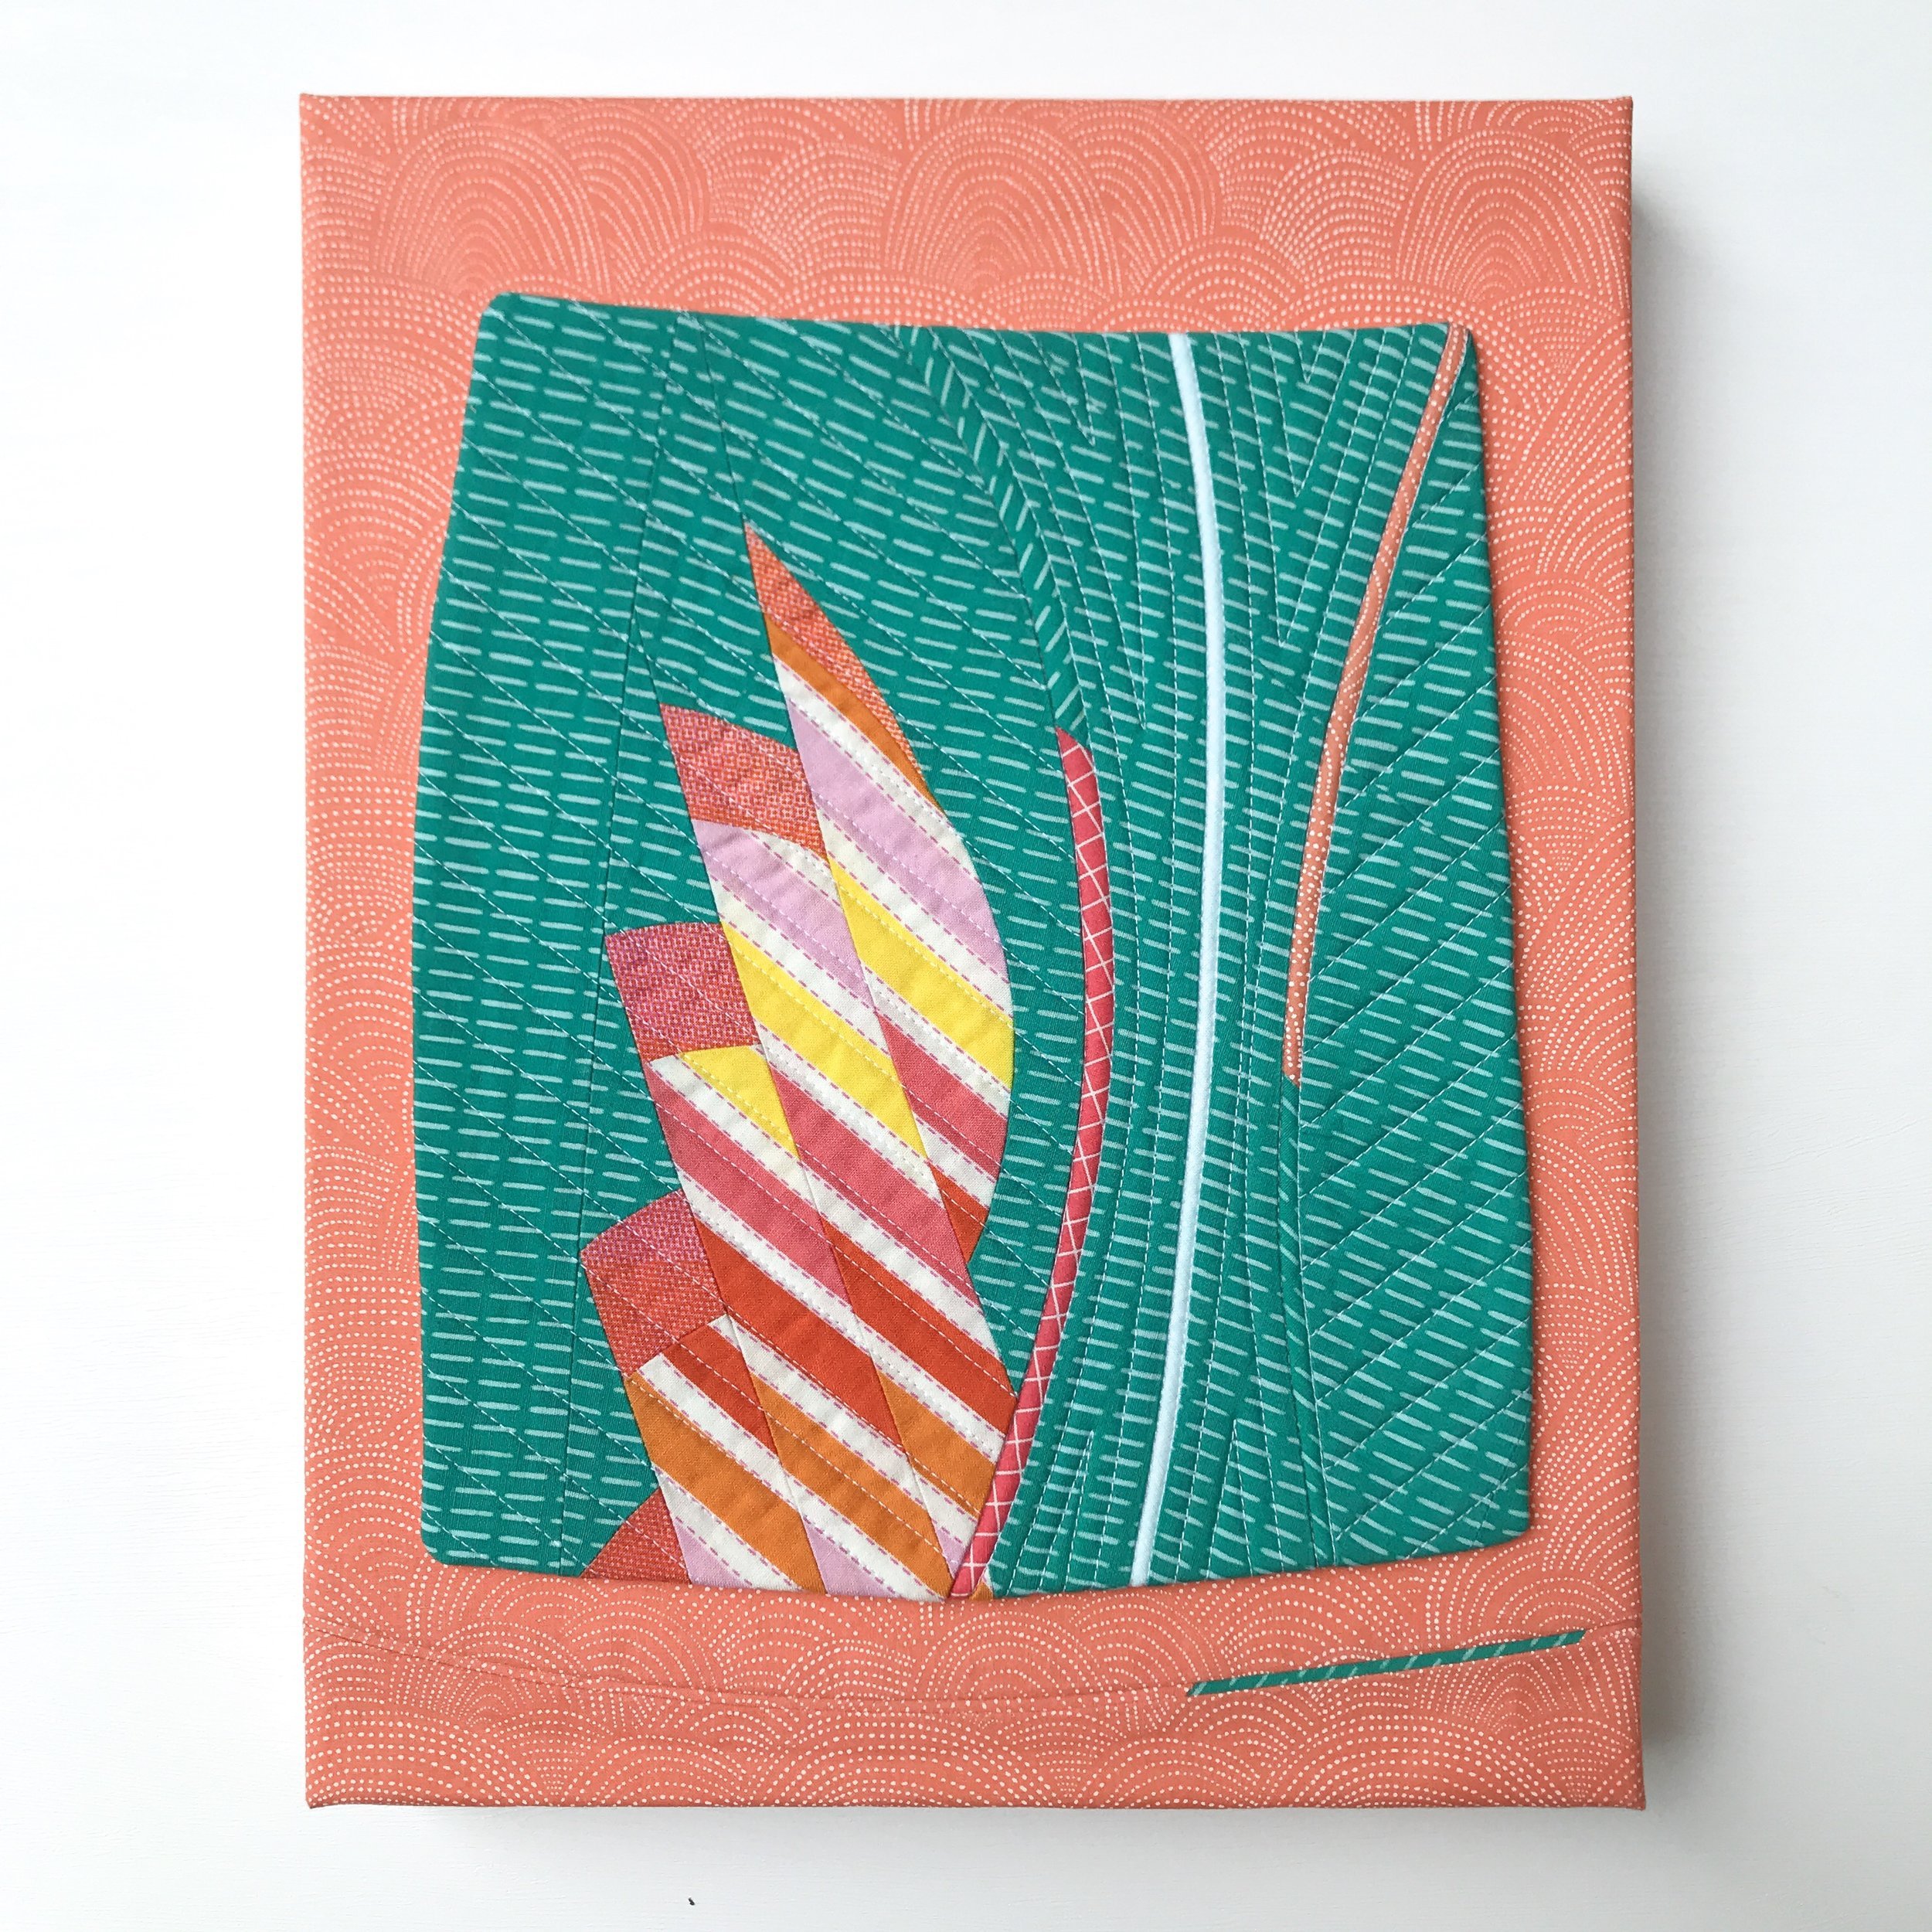
I love mounting quilts on gallery wrapped artist canvases. This style of finishing can transform small works, adding an air of sophistication and gravitas to a piece that might otherwise be mistaken for a potholder in mixed company. It’s also a great technique for mid-size quilts.
Mounting a quilt on canvas adds an air of sophistication and gravitas to a piece.
There are several ways to go about mounting. Some methods involve paint, others use facing strips. You can even attach the quilt to a separate piece of fabric that is wrapped around the canvas. I used the last method on several occasions—it’s a nice finish that creates opportunities to add design elements that complement the quilted component. But for this post, I’m going to focus on the facing method.
One method of quilt mounting involves a separate piece of fabric that is wrapped around the canvas.
Let’s Talk about Corners
One of the biggest challenges of mounting a quilt on canvas is tackling bulky corners. I refined my process over the years and finally landed on a technique that creates sharp, clean corners with no visible folds, points, or bulges. This method also makes it possible to remove the quilt from the frame fully intact if you change your mind down the road. I’m excited to share it with you!
This method of mounting creates sharp, clean corners.
Supplies
Here’s what you need to get started:
Gallery wrapped artist canvas
Staple gun and staples
Staple remover (like a seam ripper, it is essential)
Hammer
Hearing protection
Hanging hardware (sawtooth hangers for small frames, D-rings and picture wire for large frames)
Ruler
Pencil
Disappearing ink fabric pen
Lightweight interfacing
Fabric for facing strip(s)
Scissors
White polyester felt
Craft glue
Supplies include an electric upholstery staple gun, staple remover, hammer, and hanging hardware.
I buy canvases at art or craft supply stores. They come in a variety of sizes and depths—I prefer edges that are 1.5 inches deep, as I think they look more professional and gallery appropriate.
If you plan to mount more than one quilt, I strongly encourage you to invest in an electric upholstery staple gun. Manual staplers are hard on my hands, and when I “upgraded” to a basic electric staple gun from the hardware store, it jammed so many times that I wanted to throw it out a window. Several years ago, I purchased a Maestri ME3G upholstery staple gun and it has been my go-to ever since.
Some Notes on Quilt Construction
Before we get to the mounting instructions, here are some things to consider as you construct your quilt.
Shrinkage. To account for shrinkage that will occur during the quilting and trimming process, your quilt top needs to be at least 2-4 inches larger than your canvas in both width and height. The density of your quilting motif has a big impact here, so it’s best to overestimate rather than underestimate. The canvas I used for this tutorial is 24” x 24” so I designed my quilt top to be 26” x 26”. I quilted it densely with ¼-inch lines, which left me juuuuuuust enough room to work with.
Seams. When sewing the quilt top, I use 50wt. cotton thread and a smaller-than-usual stitch length (anywhere between 1.8 and 2). I generally press my seams open and have not noticed any issues during the mounting process.
Batting. I use a low-loft batting such as Quilter’s Dream Request Poly. Feel free to experiment with other fibers and lofts, just remember bulk management may become an issue when it is time to mount. You can also skip batting altogether if that suits your design preferences.
Backing Fabric. I tend to use solid white quilting cotton for backing fabric when a quilt is mounted. However, scraps and even print fabrics from your stash work well, too, since the back will not be visible when you are finished mounting the quilt. You can also skip the backing.
Prepare the Quilt for Mounting
To get the quilt ready for mounting, trim it and attach a facing strip.
1. Trim the quilt. Your quilt needs to be ½ inch larger than your canvas in both width and height (so 24.5” x 24.5” to mount it on a 24” x 24” canvas). Before you trim, it’s a good idea to add stay stitches just inside the cut lines—this will prevent your quilting stitches from coming undone during the mounting process. I mark lines on the fabric with a disappearing ink pen or chalk and trim the quilt with my serger (Fig. 1). You can use a wide zigzag stitch to achieve a similar effect.
Fig. 1. I use a serger to trim my quilts.
2. Mark the centers. Once your quilt is trimmed, mark the center of each of the four edges with a disappearing ink pen or chalk (Fig. 2).
Fig. 2. Mark the center of each of the four edges of the quilt.
3. Cut facing strip(s). Next, it’s time to cut a facing strip. The width of the strip should be twice the depth of the canvas. The edges of my canvas are 1.5 inches deep so I cut a 3-inch wide strip. To determine the length of your strip, add the length of all four sides of the canvas together, and then add an additional four inches. My canvas is 24” x 24”, so my facing strip needs to be 100 inches long. Depending on the size of your canvas, you may be able to use a single strip if you have a large enough piece of fabric. I did not, so I cut two 50-inch strips. Try to avoid using more than two strips, otherwise it is possible the joining seams will be visible to the viewer once the quilt is mounted.
4. Cut and fuse interfacing. Because you are going to pull and stretch the facing strip(s) during the mounting process, it’s a good idea to reinforce it with interfacing. I like Pellon Ek 130 Easy-Knit because it is lightweight and doesn’t add a lot of bulk to the fabric. Cut a strip or strips the same width and length as the facing and fuse to the wrong side of your fabric (Fig. 3).
Fig. 3. Cut a strip of lightweight interfacing the same width and length as the facing.
Fuse interfacing to the wrong side of your fabric.
Attach the Facing
Please read all of the instructions before you begin sewing.
1. Determine seam placement. If you use a single strip for the facing, eventually it will come together in a single seam. I like that seam to be along the bottom edge of the quilt, where it will be less noticeable when the finished piece is mounted and hanging on the wall. If you use two strips, there will be two seams. In that case, I like one seam along the bottom edge of the quilt and one seam along the top edge. Depending on your design, you may choose to place your seams elsewhere. Experiment to find your preferred placement.
2. Sew facing strip(s) to quilt. Use a thread color that matches the facing strip for this step. Lay a facing strip on your quilt, right sides together, with the end of the strip overlapping the quilt bottom’s center mark by about an inch. Using a ¼ inch seam allowance, start sewing 4 inches away from the center mark, backstitching at the beginning to secure the stitches (Fig. 4).
Fig. 4. Your facing strip should overlap the quilt’s center mark by one inch. Start and end your sewing 4 inches away from the center mark.
3. Tackle the corners. Here comes the fun part! When you are a few inches away from the first corner of the quilt, stop sewing and leave the needle down. Grab a ruler and a disappearing ink pen and draw a line on the wrong side of the facing strip that is ¼ inch above the edge of the quilt. Then mark another line at a 45-degree angle from the first mark down to the corner of the quilt (Fig. 5).
Fig. 5. Draw a line on the wrong side of the facing strip that is ¼ inch above the edge of the quilt. Then mark another line at a 45-degree angle from the first mark down to the corner of the quilt.
Continue stitching until the needle lands directly in the intersection of those two lines (Fig. 6). You may need to adjust the stitch length to do so. Take 2-3 back stitches, then return to the intersection of lines, leaving the needle down.
Fig. 6. Continue stitching until the needle lands directly in the intersection of the marked lines.
Raise the presser foot and use a pair of small snips to cut the facing strip along the 45-degree line you marked (Fig. 7). I clip up to a point that is roughly 2-3 threads away from the needle.
Fig. 7. Use a pair of small snips to cut the facing strip along the 45-degree line.
With the needle down, turn the quilt and the facing (Fig. 8).
Fig. 8. With the needle down, turn the quilt and the facing.
Raise the presser foot and position the facing strip so that it is parallel with the next edge of the quilt. The clip in the fabric will make it easy to gently rotate and fold the excess facing out of the way (Fig. 9). Sew 2-3 forward stitches, then backstitch again before continuing down the side of the quilt until you get to the next corner.
Fig. 9. Raise the presser foot and position the facing strip so that it is parallel with the next edge of the quilt.
Gently fold any excess facing strip out of the way before sewing down the next edge.
This is what the corner looks like on the back after sewing.
If you have a single facing strip, repeat this step at each of the next three corners, and then stop sewing 4 inches away from the original center mark. If you are using two facing strips, attach each one separately, starting and stopping your sewing of each strip roughly 4 inches away from the center marks on opposite sides of the quilt.
Start and stop your sewing of each strip roughly 4 inches away from the center mark.
4. Join the ends of the facing strip(s). With the loose ends of the facing strip aligned with the edge of the quilt, use one or two pins to temporarily secure them in place, right sides together. Next, fold each end of the strip back onto itself, wrong sides together, so that the fold falls directly on the center mark of the quilt (Fig. 10). Press.
Fig. 10. Fold each end of your strip back onto itself, wrong sides together, so that the fold falls directly on the center mark of your quilt.
Press the folded ends.
Where the folded ends of the facing strip meet is where you’ll sew them together. But first, you need to add a seam allowance. To do so, cut each end of the facing strip ¼ inch past the fold line (Fig. 11).
Fig. 11. Cut each end of your facing strip ¼ inch past the fold line to create a seam allowance.
Next, remove the pins that secured the loose ends of the strip. Use them to pin the newly cut ends right sides together, then sew down the fold line to join them (Fig. 12). You may need to fold or manipulate the quilt in order to get the ends of the strip underneath the presser foot.
Fig. 12. Pin the cut ends of your facing strip right sides together.
Sew down the fold line to join the two ends.
Press the seam allowance open, then pin and sew the finished facing strip to the quilt (Fig. 13). If you used two facing strips, you need to repeat this process on the opposite side of your quilt.
Fig. 13. Press the seam allowance open, then pin and sew the finished facing strip to the quilt.
5. Press the facing. After attaching the facing strip(s), press it away from the quilt (Fig. 14).
Fig. 14. Press the facing strip away from the quilt.
6. Clip corners and grade seam allowance. This necessary step reduces bulk and ensures crisp, clean corners during mounting. Clip all four corners of the quilt, being careful to avoid the stitches that attach the facing to the quilt (Fig. 15). Grade the seam allowance by trimming ⅛ inch off the quilt on all four sides—do not trim the facing strip (Fig. 16).
Fig. 15. Clip all four corners of the quilt.
Fig. 16. Grade the seam allowance by trimming ⅛ inch off the quilt on all four sides.
Do not trim the facing strip when grading the seam allowance.
Mount the Quilt
1. Add registration marks to the canvas frame. On the back of the canvas frame, use a ruler and pencil to mark the center of the frame on each of the four edges (Fig. 17). If the quilt has any design elements that you want to ensure remain straight or square once the piece is mounted, such as the horizon line on my quilt, measure and mark those, too.
Fig. 17. Mark the center of your frame on each of the four edges.
2. Add registration marks to the facing strip. Next, measure and mark the same locations on the wrong side of the quilt facing strip—the center of each of the four edges, as well as any significant design elements (Fig. 18).
Fig. 18. Transfer registration marks to the wrong side of the facing strip.
3. Place the quilt on the canvas. Place the canvas on a flat surface, right side up, and lay the quilt on the canvas (Fig. 19). If your facing strip has a single seam, place it along the bottom edge of the canvas. In this position, it will be nearly invisible once the piece is finished and hanging on the wall. If your facing strip has two seams, place them along the top and bottom edges of the canvas. I generally avoid placing seams on the left and right sides of the canvas because those tend to be in the viewer’s line of sight once the piece is on the wall.
Fig. 19. Place the canvas on a flat surface, right side up, and lay the quilt on the canvas.
Next, use your fingers to hold one corner in place while you lift the canvas and turn the facing strip right side out. Repeat for all four corners, then lay the combined canvas and quilt back down, right side down (Fig. 20). Check to ensure the registration marks on the frame roughly line up with the registration marks on the facing.
Fig. 20. Turn the facing strip right side out.
4. Staple facing strip to back side of canvas. Now it’s time to refine the position of the quilt and secure it to the canvas. Please use hearing protection for this part of the process! Starting at the top of the canvas, align the center registration marks on the quilt facing and frame, pull the facing taut around the edge of the frame, and place one staple at the center (Fig. 21).
Fig. 21. Align the registration marks, pull the facing taut around the edge of the frame, and place one staple at the center.
Next, stretch the quilt as necessary across to the opposite side of the frame, and place one staple at that center. Repeat for the left and right sides. Think of these four staples as stay stitches—you want to get them as close as possible to their final position, with the understanding that some adjustment may be necessary later on (Fig. 22).
Fig. 22. Start with four staples: one on each side of the canvas.
Working out from the center, continue adding staples along two adjacent edges, working towards one of the four corners. Pull the facing strip taut as you go, aligning the edge of the quilt with the front edge of the canvas (paying attention to any straight lines or important registration marks), and space the staples roughly 2 inches apart. Pull the facing seam over the front edge of the canvas juuuust a tiny bit (Fig. 23) to get a nice, clean finish. I like to rest one edge of the canvas on a table and hold the opposite edge in an upright position while I work.
Fig. 23. Pull the facing seam over the front edge of the canvas for a nice, clean finish.
Continue stapling two adjacent edges in tandem, removing and repositioning any staples if necessary, until you are a few inches away from the corner. Then, finish stapling along one side (Fig. 24). This will make it easy to fold the second side of the facing over the first to create a clean, mitered edge. It’s just like wrapping a present! Staple the fold (Fig. 25), and then continue down the second edge to finish it. Repeat this process until all four corners and edges are complete.
Fig. 24. Staple two adjacent edges in tandem until you are a few inches away from the corner.
Fig. 25. Fold the facing into a mitered corner and staple.
5. Refine staple placement. Once you finish the initial round of staples, fill in the gaps so that there is a staple every inch or ½ inch. Using more staples results in a clean, sharp finish. Hammer any staples that didn’t sink down into the wood until they are flush with the surface (Fig. 26).
Fig. 26. Hammer any staples that didn’t sink down into the wood until they are flush with the surface.
Spiff Up the Back
At this point in the process, most people are probably satisfied with the back of the canvas as-is, but I like to take an additional step.
Most people probably stop here, but I like to spiff up the backside with an extra step.
1. Trim away the excess facing strip. Use scissors to trim the excess facing strip as close to the staples as possible (Fig. 27). Don’t worry if it looks messy—we’ll fix that in a minute.
Fig. 27. Trim the excess facing strip as close to the staples as possible.
2. Install D-rings and picture wire for hanging. If your canvas is 20” x 20” or larger, now is the time to install the D-rings that hold the picture wire. (If your canvas is smaller than 20” x 20”, skip this step.) Use a pencil to mark the left and right sides of the canvas frame one third of the way down from the top edge (Fig. 28). In this example, my canvas is 24 inches tall, so my marks are 8 inches down from the top edge. Screw the D-rings into the frame at a 45-degree angle (Fig. 29).
Fig. 28. Mark the left and right sides of the canvas frame one third of the way down from the top edge.
Fig. 29. Screw the D-rings into the frame at a 45-degree angle.
Next, cut a length of picture wire that is roughly 8 inches longer than the width of the canvas (mine was 32 inches long for a 24-inch canvas). Pull 4-5 inches of wire through one D-ring, loop it around itself as pictured (Fig. 30), and twist the excess around the main length of wire. Then pull the main wire taut and secure the other end to the other D-ring in the same manner. You want as little slack in the wire as possible when you are finished.
Fig. 30. Follow these instructions to wrap the picture wire around the D-rings.
3. Cover the cut edge of the fabric with felt. Cut 4 strips of polyester felt that are 1 inch wide and the same length of your canvas. Trim the ends to 45-degree angles, then position the felt so that it is roughly ⅛ inch away from the outside edge of the canvas frame (Fig. 31). Glue the felt into place for a clean finish (Fig. 32).
Fig. 31. Cut 4 strips of felt that are 1 inch wide and the same length as the canvas. Trim ends to a 45-degree angle.
Fig. 32. Glue felt strips into place.
4. Install sawtooth hanging hardware. If your canvas is 20 inches or smaller, install a sawtooth hanger in the center of the top of the frame, hammering the nails through the felt.
5. Sign and date your work. All of the hard work is done! Now it’s time to sign and date your work. I used a custom silkscreen to print my signature and contact information on the back of my canvas (Fig. 33). A custom stamp would also work great, or you can use permanent marker.
Fig. 33. I used a custom silkscreen to print my signature and contact information on the back of my canvas.
Optional Upgrade
To add even more pizazz to your piece, you can attach your finished canvas to a floater frame. None of the artwork is covered by this style of frame, meaning all four edges of your canvas remain visible. Depending on the size and depth of your canvas, ready made floater frames can be pricey, so I reserve this upgrade for special pieces.
To add even more pizazz to your piece, you can mount your finished canvas to a floater frame. A white, wooden frame is shown here.
If you use a floater frame, skip the felt strips and install appropriate hanging hardware after the canvas is mounted to the frame.
Sit back and admire your work
Ice Queen Razzle Dazzle by Kelly Spell, 24” x 24”, October 2023
I hope you enjoyed this tutorial! If you have any questions or comments, please drop them in the comment section below.
To see more of my mounted quilts, click here. Finally, I’d love to see YOUR mounted quilts! Share them on Instagram using the hashtag #mountedquilt.