Cut It Up: The Story Behind My "Felicitous Pickle" Quilt
This morning, I woke up to a fun surprise. Make Modern magazine shared a live video on Instagram, giving followers a sneak peek at the Adelaide Craft & Quilt Fair in Australia, which runs March 21-24. “Felicitous Pickle” is there, hanging in The Modern Quilt Guild’s (MQG) 2019 Best of QuiltCon Traveling Exhibit.

“Felicitous Pickle” hangs at QuiltCon 2019 in Nashville.
This is the first time I’ve been invited to exhibit a quilt globally. If, from the outside, it looks as if I’m taking the news in stride, know that on the inside I am totally freaking out. FREAKING OUT. Just yesterday, I opened up issue 16 of Simply Moderne magazine to see a full-page picture of The Pickle (as it’s known around here)—someone pinch me!
Over the next 12 months, The Pickle will travel the world with a small group of quilts selected by the MQG to represent the 2019 QuiltCon show, which was held last month in Nashville. As the tour gets underway, now seemed like a good time to officially document the quilt’s story.
Humble Beginnings
Have you ever made a quilt that had no significance or meaning when you started sewing, but that quickly transformed into your favorite make halfway through the process? That’s what happened with this one.
It all started in 2017, when the Chattanooga Modern Quilt Guild (ChattMQG) invited author and antique quilt enthusiast Mary Kerr to town for a lecture and workshop. She’s known for incorporating antique blocks and vintage textiles into modern quilts, and her work is gorgeous.
To help reinforce the techniques Mary taught us, ChattMQG launched its first Cut It Up! Challenge in June 2017. As a group, we brainstormed ways to cut up and redesign one traditional quilt top, and then set about transforming it. The end result was such a hit that we revived the challenge in 2018, with a few added twists.
Cut It Up
How many WIPs are currently in your sewing studio? Do you have any orphan blocks lying around? For the 2018 rendition of the Cut It Up! Challenge, we gathered our neglected projects and swapped them with guild mates. Then we worked individually to cut up those UFOs and use the pieces to create new, modern quilts.

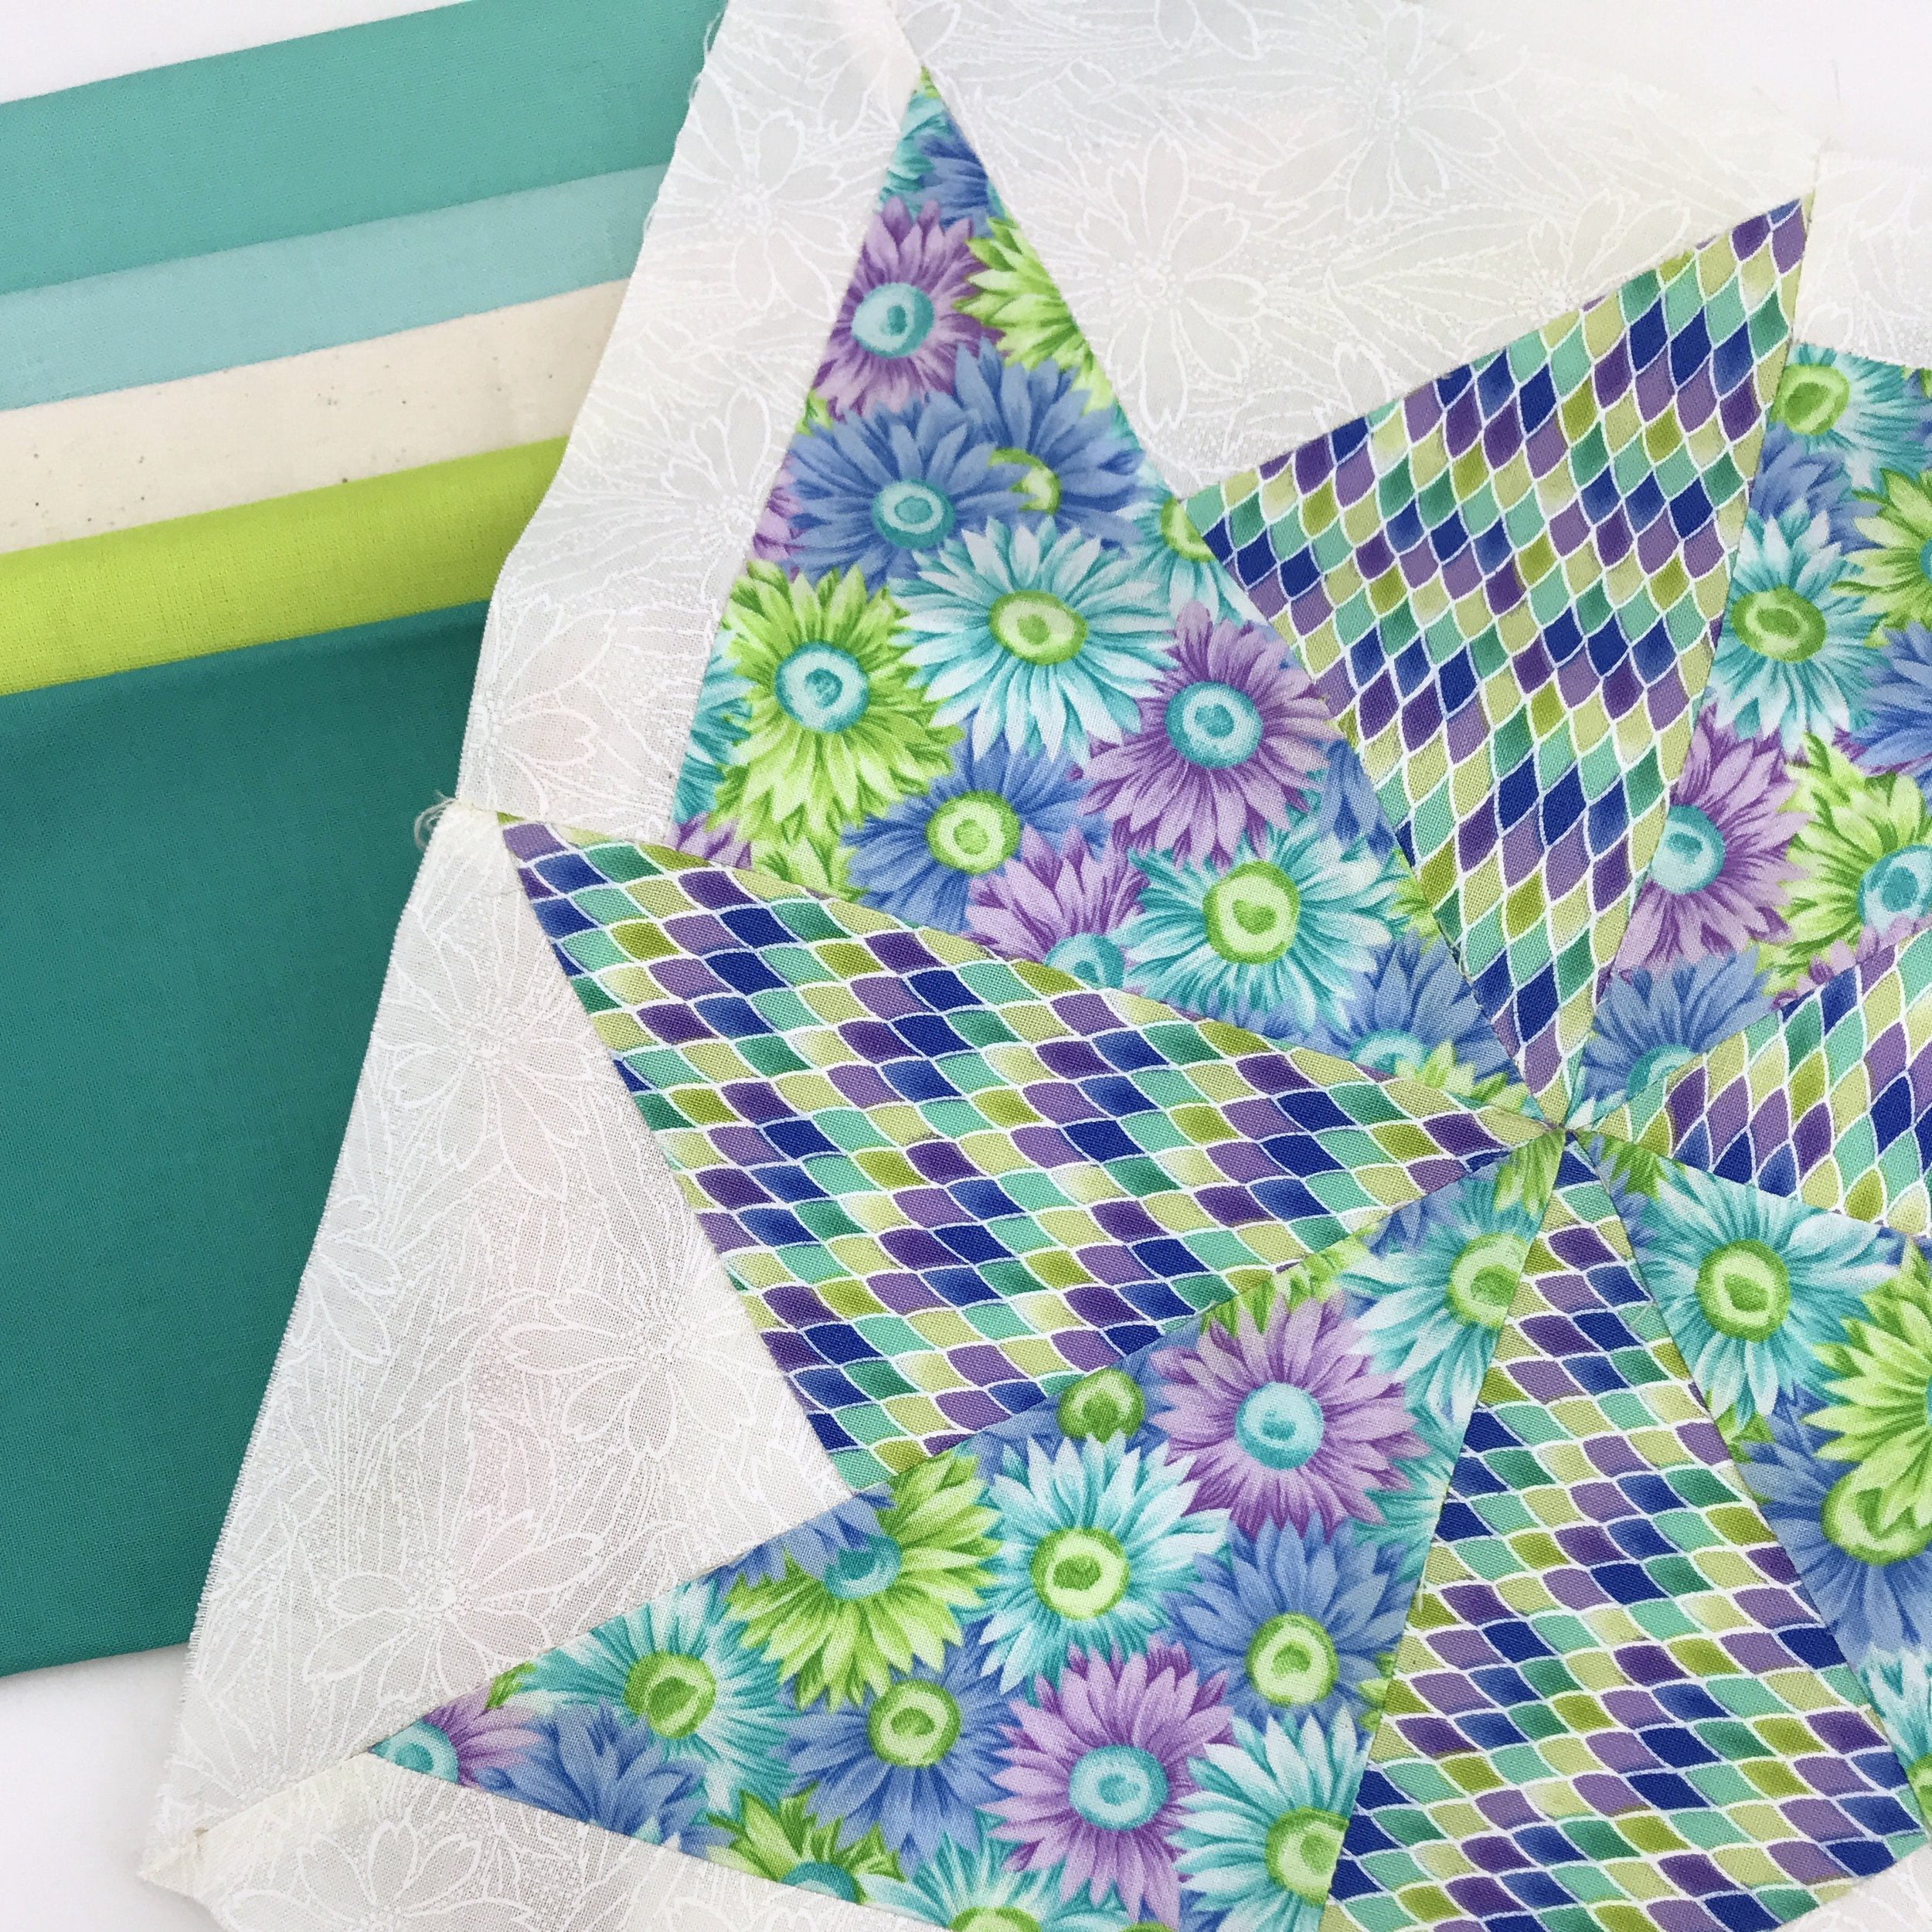


I inherited one 12” stack-n-whack block from my friend Ann Hurley (see above). I picked it because of the color palette and the white-on-white background print.
Stack-n-whack blocks were created by Bethany Reynolds, and many quilters use them to create a kaleidoscope effect in their quilt designs. With that in mind, I tried to come up with a motif that conveyed a kaleidoscope look. I drew a replica of Ann’s block on graph paper, cut it up and arranged it several ways, but nothing screamed, “Make me!!”
After setting the project aside for several weeks, I had another idea: large, gentle curves with spikes along the outside edges.
Sew it Back Together
With a simple line drawing in hand, I got to work. After ripping several seams in Ann’s block to break it down into eight half-square triangles, I added coordinating solids to those to form rectangles. Next I sliced the rectangles into strips to create the spikes.
As I debated which background fabric to use, I knew I needed something to tone down the sweetness of the floral print from the original block. Eventually I settled on Kona Cotton Wasabi, and boy, it brought the heat! I cut that into uniform wedges and sewed them in between the spikes to create the curves.


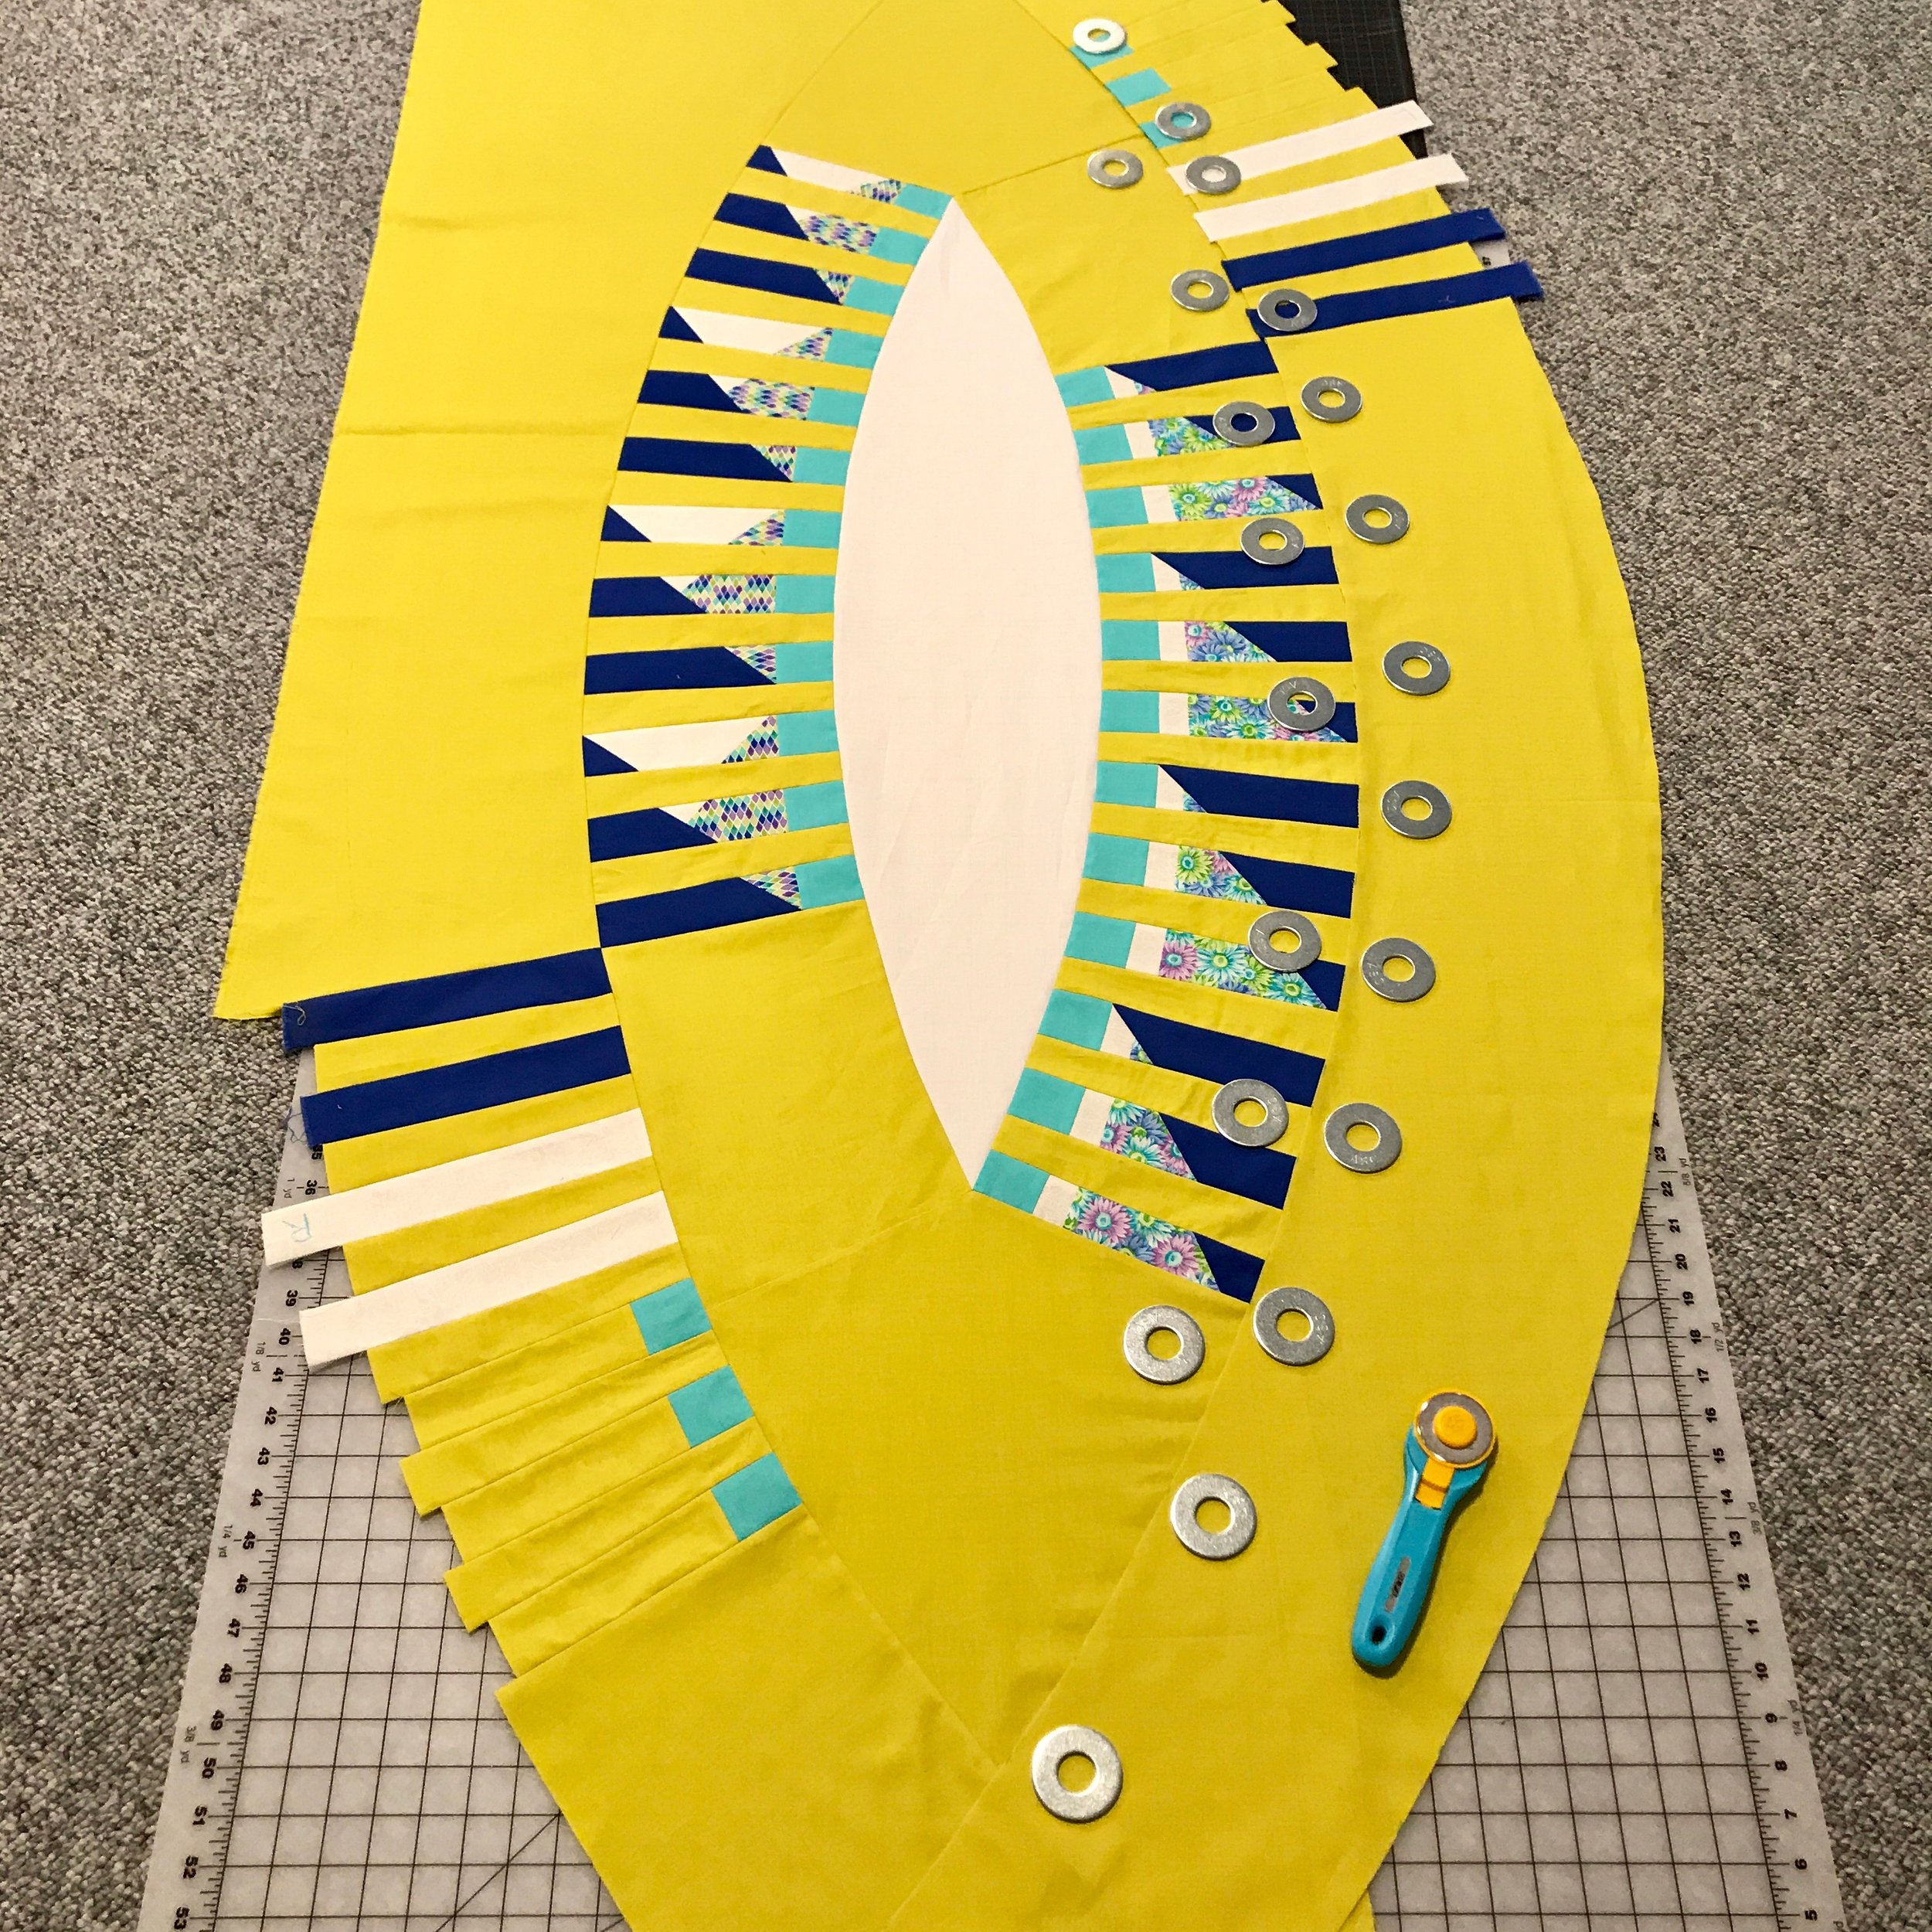


Then came the tricky part: joining the long, spiky sides. For that, I turned to a tutorial Audrey Workman wrote for ChattMQG on sewing improvisational curves. I stacked a pieced section on top of white background fabric, with right sides facing up, and cut one side of the curve. Matching several points, I sewed the two pieces together. Then I followed the same procedure for the other side. It worked perfectly! (Tito was a lot of help.)
The giant washers I bought from the hardware store made great pattern weights to hold everything in place while I cut.
Quilt It
With the deadline looming to reveal a finished quilt to the guild, I decided to keep the quilting simple: vertical lines 1/2” apart. The thread is Fil-Tec Glide 40-weight polyester, and I used Quilter’s Dream Select Poly batting.
This was my first time attempting straight-line quilting on the longarm, which presents a different set of challenges than doing it on a regular sewing machine. After realizing I needed to keep the quilting lines parallel to the machine’s frame each time I advanced the quilt, I was good to go.
The Big Reveal
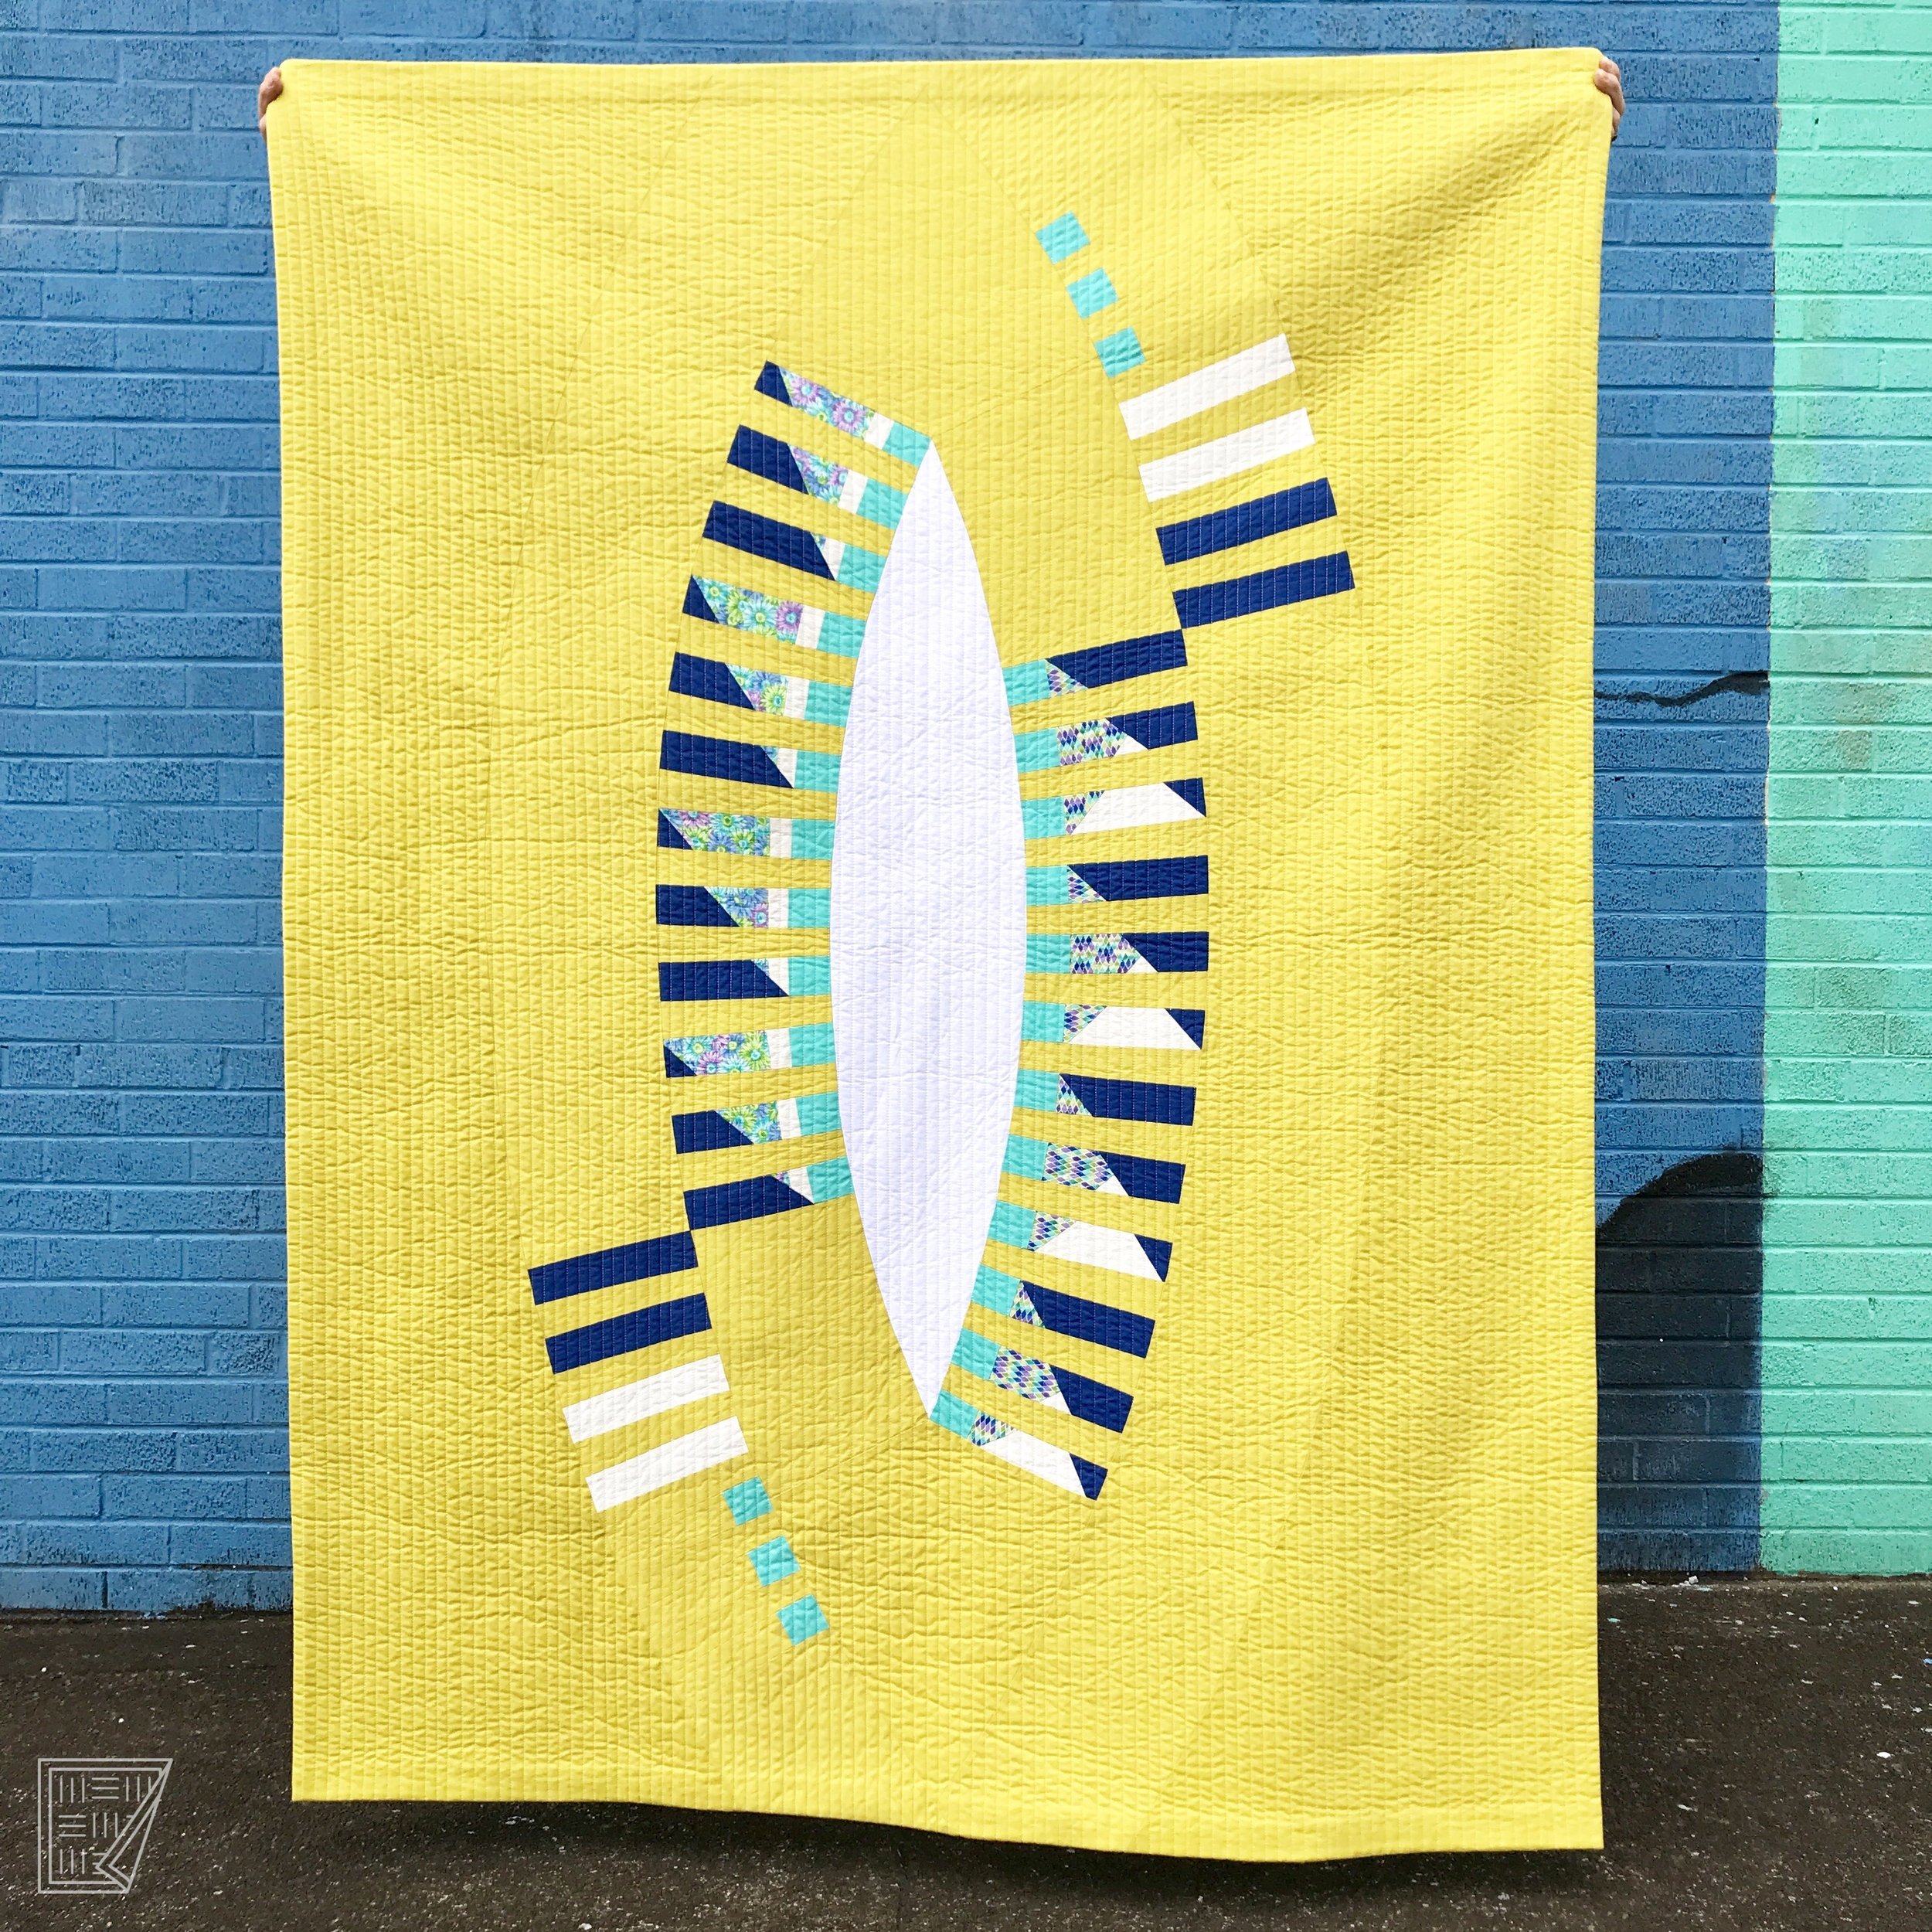
By the time I finished the piece in June 2018, it was clear the design had nothing to do with a kaleidoscope. And it was huge (it finished at 51” x 68”).
When sewing, I like to start with a half-baked idea and let the fabric guide me along the way. Sometimes that means the finished project result looks nothing like my initial sketch! In the end, this quilt resembled a traditional pickle dish block, which I’ve always admired but have never made.
When quilt historian Merikay Waldvogel saw it at QuiltCon, she said, “It looks very Tennessee.” Apparently spiky quilts have long been popular in this state, which seems very felicitous, indeed.